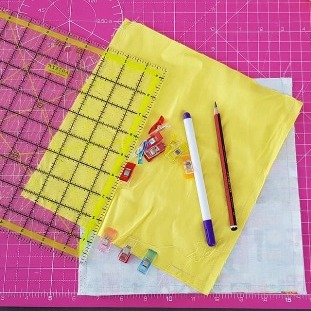
I've been asked, by the very lovely Amy of Hen in a Hedge (check out her website here) to write up a quick how-to of some storage bags I made recently. There are hundreds of other blogs offering something similar; but when that's the case, it makes it so hard to know where to start and who to follow.
Now, the VERY important question. Is it a box? Is it a bag? What's the difference? Please feel free to discuss in the comments!!

What do you need:
4 lots of 9.5" squares - they don't need to be 9.5", and they don't need to be square, but we'll discuss that below!
Scissors or rotary cutter
Sewing machine (and thread)
A pencil or pen - my fave is a 6B soft pencil
A ruler - I love these clear rulers
Clips or pins
Excitement and enthusiasm
What will you make:
A storage box which is: 6" tall, 3.5" wide, and 5" long.
LETS DO THIS!
Step One - cut out four 9.5" squares. Two in your main fabric, two in your lining fabric.
Step Two - place your main fabric right sides together. If your fabric is directional like mine (I don't want upside down ice creams and cups of coffee!) then ensure that they are both facing up. Clip (or pin) around the two sides and the bottom edge. You are going to sew from top left, down, along the bottom, and up the right. You will leave the top edge open.
** Don't know how to turn corners on a sewing machine? Keep tuned, I'll pop up a blog post on that next week.
Step Three - repeat step two for your lining fabric BUT leave a gap along the bottom. See above where I have three clips next to each other? This helps me remember not to sew there, and ensures my turning circle (this little hole) is in the right place and the right size. You're aiming for a 2-3" gap.
Step Four - Square off your corners. Pick up your bag by one of the bottom corners, we're going to open it out, so I pinch each side and pull apart, smooth the opening, so the bottom and side seams are touching, and you have a square looking corner, with a seam running at 45'.
Step Five - using a ruler, measure 2.5" along the seam and mark. Using your ruler, mark a line at 90' to the seam and draw on the fabric; this is much easier with a clear ruler. Repeat for the other three corners and (if desired) clip in place. Sew along these four lines, ensure you secure your stitches at the beginning and end.
This is a tricky bit to explain, so I've popped a little video in if you work better with a more hands on view.
Step Six - Give yourself a pat on the back and make a cuppa, you'll be finished soon!
Step Seven - turn your lining the right way out, and place it inside your main fabric. Align side seams and clip all around the top edge. Open the bag and sew along the top seam in a circle. DO NOT SEW YOUR BAG CLOSED.
Step Eight - turn your bag right side out. Put your hand in, through the turning circle, and pull the whole bag out through that hole. Give it a shake and a flick, then pop your hand back in, and lay the corner tabs flat along the bottom of the box.
Step Nine - close your turning hole. I prefer to do this by machine, but it can be done by hand if desired. Tucking in the raw edges, clip the hole closed. Sew, ensuring you secure your seams at the start and end. Snip threads and pop the inside back into the bag.
Step Ten - you are done!!! Enjoy your bag/box/storage vessel.
VARIATIONS
Top stitching - optional - you can sew one or two rows of straight stitches around the circumference
Forgot to leave a turning circle?! - Leave one at the top when attaching the lining to the main, but then you NEED to top stitch to close.
Thin fabric - add a layer of iron on interfacing to one or both sides for added rigidity.
Scrap busting - use old ripped jeans either inside, or outside, using the pockets as usable features.
Different sizes - this will work for any rectangle or square, just ensure you think about how far in to box your corners, the further in, the deeper your box.
Let me know how you get on over at Annabel Sews Social Sewers on Facebook!!
Take care,
Annabel x


Omg! Thank you so much for making this tutorial! I can't wait to start one!